2. 从0到1搭建SpringCloud项目
1. 新建父工程
以“下单”需要调“支付”模块为例,从零开始搭建springcloud-001项目,陆续集成相关组件。 新建服务提供者cloud-payment工程,服务调用者cloud-order工程,完成order对payment的调用。 


只留下pom文件,其余src等删掉。修改pom文件,添加依赖,打包方式为pom:
<?xml version="1.0" encoding="UTF-8"?>
<project xmlns="http://maven.apache.org/POM/4.0.0"
         xmlns:xsi="http://www.w3.org/2001/XMLSchema-instance"
         xsi:schemaLocation="http://maven.apache.org/POM/4.0.0 http://maven.apache.org/xsd/maven-4.0.0.xsd">
    <modelVersion>4.0.0</modelVersion>

   <groupId>org.test.springcloud</groupId>
   <artifactId>springcloud-001</artifactId>
   <version>1.0-SNAPSHOT</version>
   <packaging>pom</packaging>

    <!--统一管理jar包版本-->
    <properties>
        <project.build.sourceEncoding>UTF-8</project.build.sourceEncoding>
        <maven.compiler.source>1.8</maven.compiler.source>
        <maven.compiler.target>1.8</maven.compiler.target>
        <junit.version>4.12</junit.version>
        <log4j.version>1.2.12</log4j.version>
        <lombok.version>1.16.20</lombok.version>
        <mysql.version>8.0.29</mysql.version>
        <druid.verison>1.1.10</druid.verison>
        <mybatisplus.version>3.1.1</mybatisplus.version>
        <mybatis.spring.boot.verison>1.3.0</mybatis.spring.boot.verison>
    </properties>

    <dependencyManagement>
        <dependencies>
            <dependency>
                <groupId>org.springframework.boot</groupId>
                <artifactId>spring-boot-dependencies</artifactId>
                <version>2.7.1</version>
                <type>pom</type>
                <scope>import</scope>
            </dependency>
            <dependency>
                <groupId>org.springframework.cloud</groupId>
                <artifactId>spring-cloud-dependencies</artifactId>
                <version>2021.0.3</version>
                <type>pom</type>
                <scope>import</scope>
            </dependency>

            <!-- MySql -->
            <dependency>
                <groupId>mysql</groupId>
                <artifactId>mysql-connector-java</artifactId>
                <version>${mysql.version}</version>
            </dependency>
            <!-- Druid -->
            <dependency>
                <groupId>com.alibaba</groupId>
                <artifactId>druid-spring-boot-starter</artifactId>
                <version>${druid.verison}</version>
            </dependency>

            <!--lombok-->
            <dependency>
                <groupId>org.projectlombok</groupId>
                <artifactId>lombok</artifactId>
                <version>${lombok.version}</version>
            </dependency>
            <!--junit-->
            <dependency>
                <groupId>junit</groupId>
                <artifactId>junit</artifactId>
                <version>${junit.version}</version>
            </dependency>
            <!-- log4j -->
            <dependency>
                <groupId>log4j</groupId>
                <artifactId>log4j</artifactId>
                <version>${log4j.version}</version>
            </dependency>
              <!-- mybatis-plus -->
            <dependency>
                <groupId>com.baomidou</groupId>
                <artifactId>mybatis-plus</artifactId>
                <version>${mybatisplus.version}</version>
            </dependency>
            <dependency>
                <groupId>com.baomidou</groupId>
                <artifactId>mybatis-plus-boot-starter</artifactId>
                <version>${mybatisplus.version}</version>
            </dependency>

        </dependencies>
    </dependencyManagement>


    <build>
        <plugins>
            <plugin>
                <groupId>org.springframework.boot</groupId>
                <artifactId>spring-boot-maven-plugin</artifactId>
                <version>2.3.0.RELEASE</version>
                <configuration>
                    <fork>true</fork>
                    <addResources>true</addResources>
                </configuration>
            </plugin>
        </plugins>
    </build>
</project>
小回顾:
1)dependencyManagement标签和dependencies标签。dependencyManagement标签一般用在父工程,声明版本,但是不真正引入,dependencies标签一般用在子工程,真正引入依赖。只有在子项目写了该依赖,并且没有指定具体版本,才会从父项目中继承,并且version和scope都读取自父pom,如果子项目指定了版本号,那么会使用子项目指定的jar版本
2)packaging 共分为pom、jar、war类型。
- pom: 父类型都为pom类型;子模块也会用到pom,比如common通用模块。仅仅是一个引用其它maven 项目的POM。
- jar: 内部调用或者是作服务使用 packing默认类型jar类型,maven会将该项目打成jar包。
- war: 需要部署的项目。(tomcat部署)
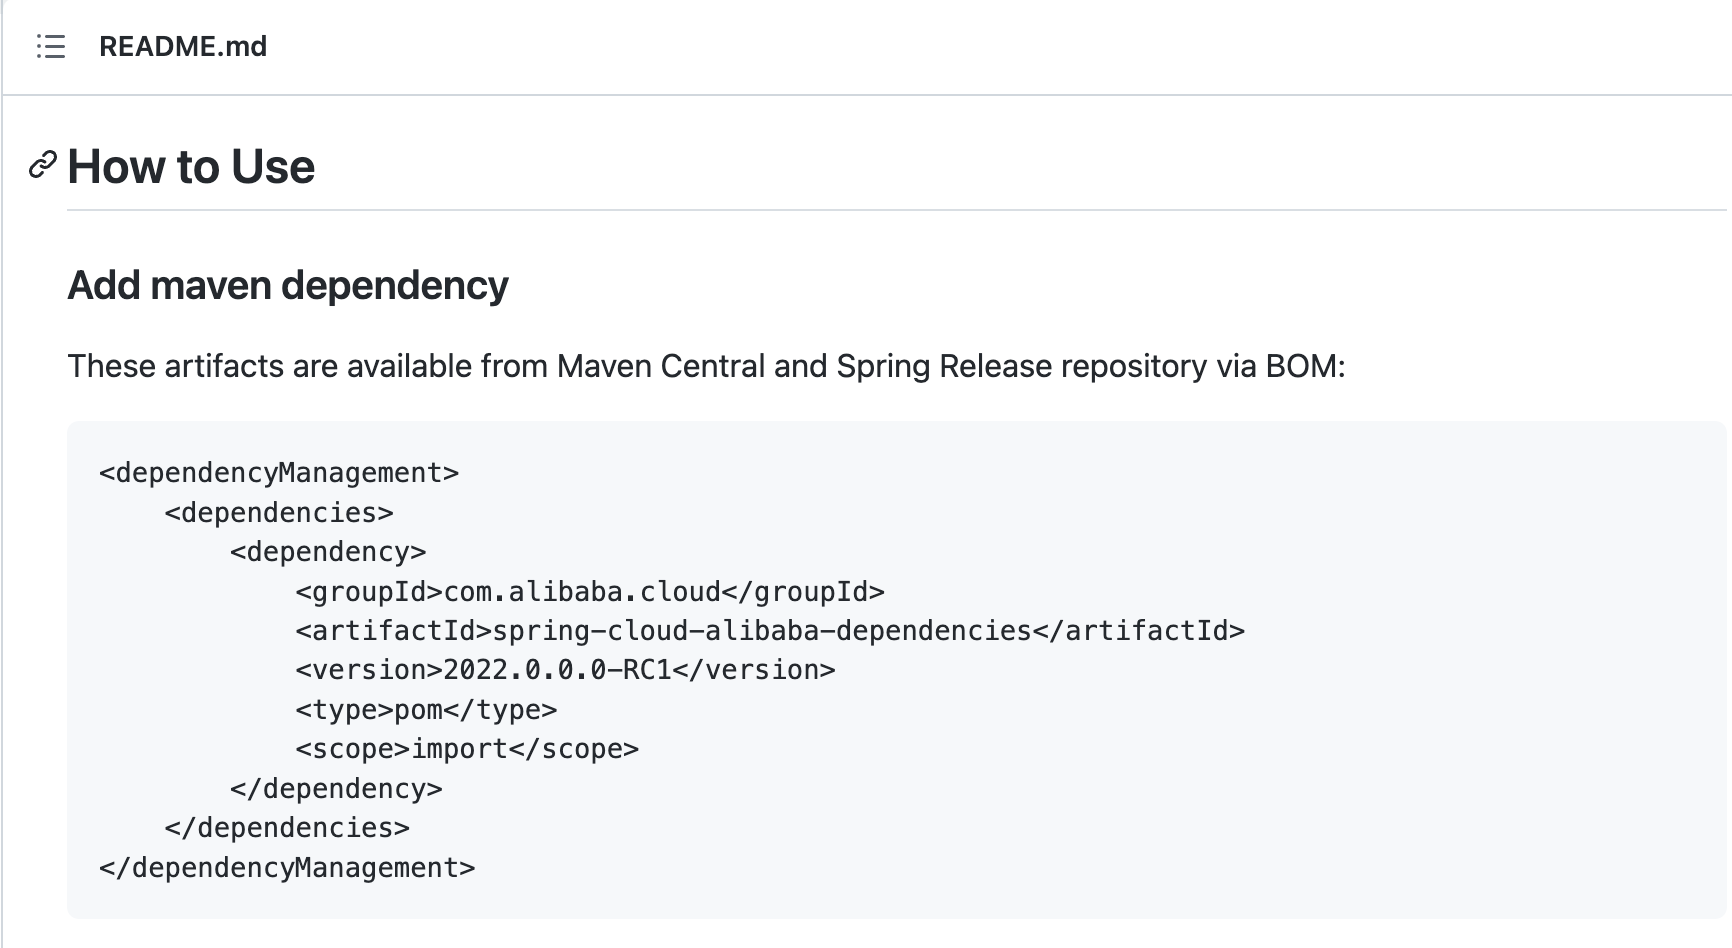
https://github.com/alibaba/spring-cloud-alibaba/ 可以查看pom依赖

2. 建子项目-服务提供者
2.1 建module
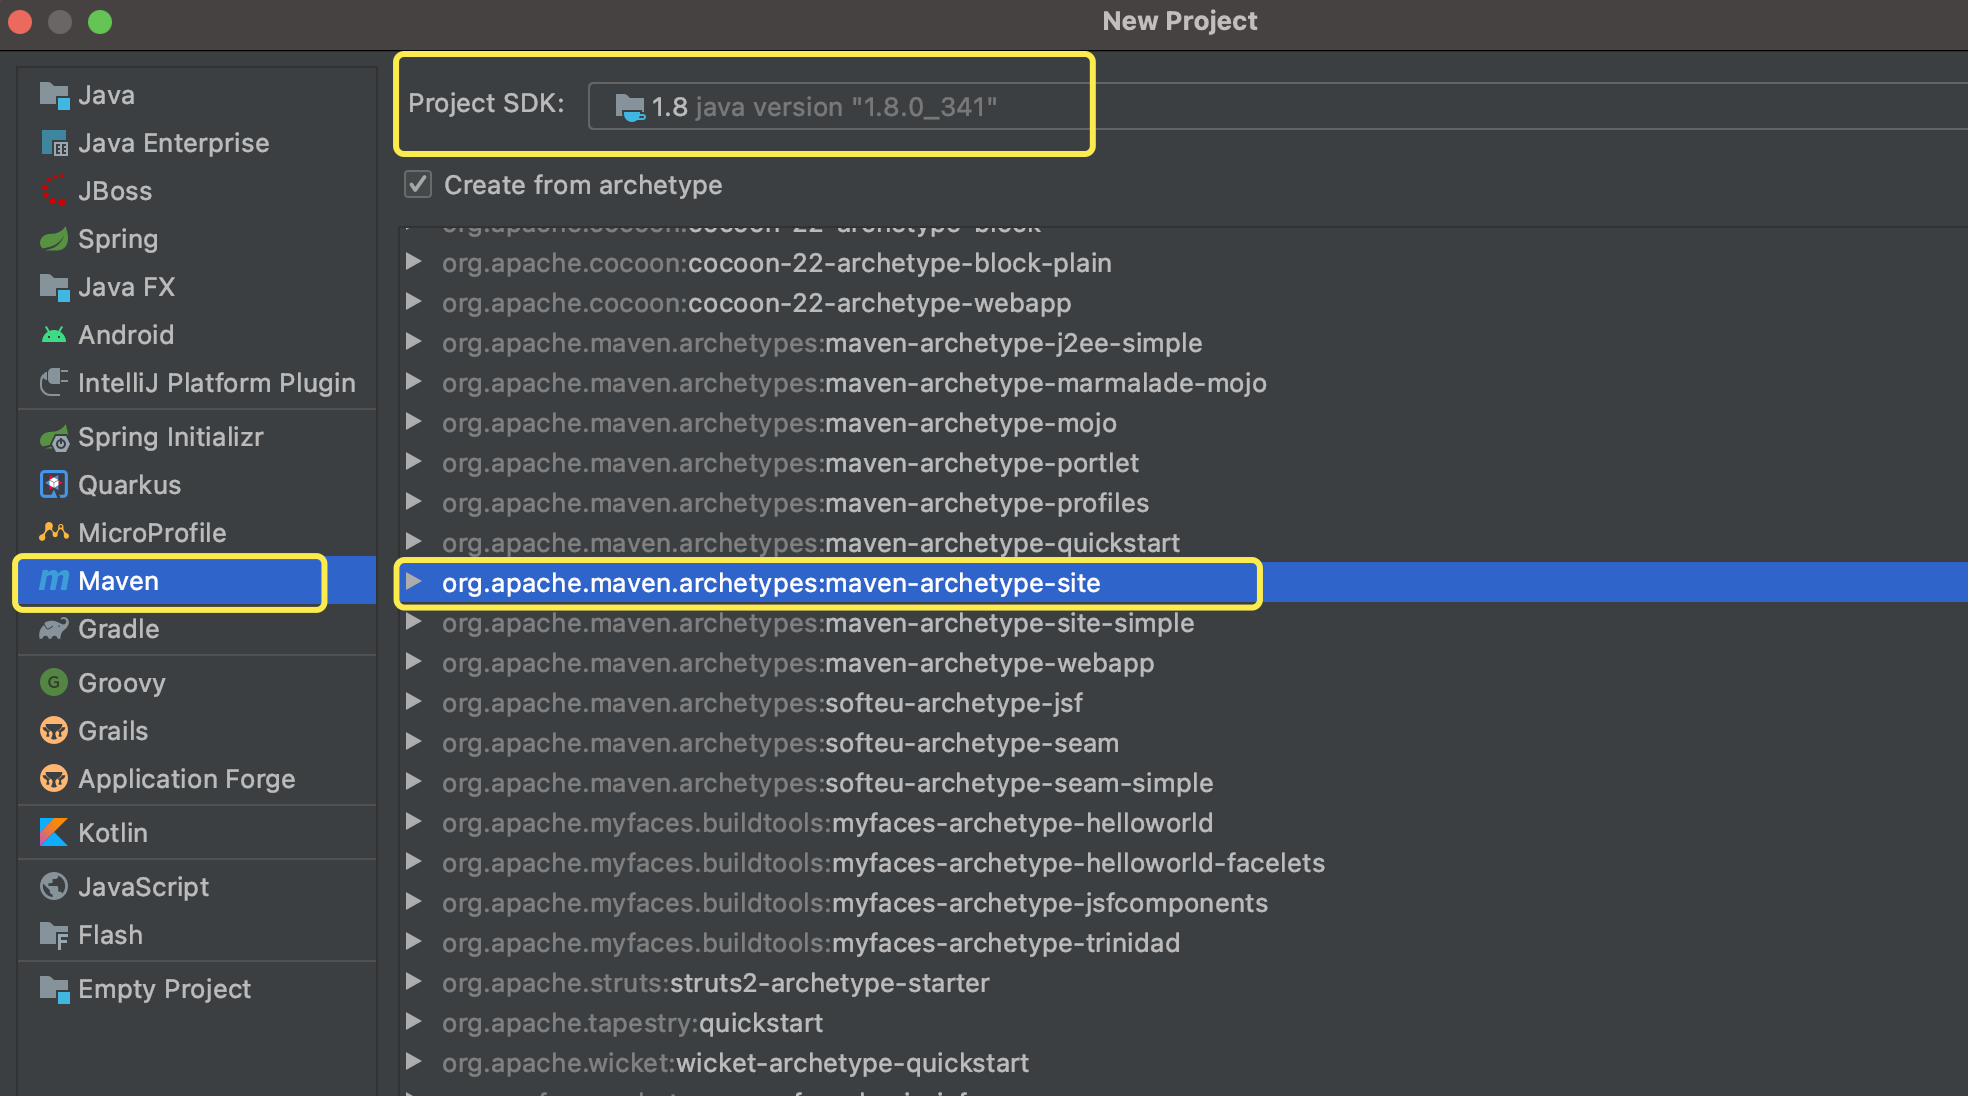
工程右键->module->maven->选择jdk->下一步完成
子module创建完,打开父pom,可以看到新父pom增进来modules系列标签:  子pom中增进了parent标签:
2.2 改子pom文件
继承了父工程的所以不用写version和scope,只需有 artifactId标签内容即可,添加依赖:
<?xml version="1.0" encoding="UTF-8"?>
<project xmlns="http://maven.apache.org/POM/4.0.0"
         xmlns:xsi="http://www.w3.org/2001/XMLSchema-instance"
         xsi:schemaLocation="http://maven.apache.org/POM/4.0.0 http://maven.apache.org/xsd/maven-4.0.0.xsd">
     <parent>
        <artifactId>springcloud-001</artifactId>
        <groupId>org.test.springcloud</groupId>
        <version>1.0-SNAPSHOT</version>
    </parent>
    <modelVersion>4.0.0</modelVersion>

    <artifactId>cloud-payment</artifactId>

    <dependencies>
        <dependency>
            <groupId>org.springframework.boot</groupId>
            <artifactId>spring-boot-starter-web</artifactId>
        </dependency>
        <dependency>
            <groupId>org.springframework.boot</groupId>
            <artifactId>spring-boot-starter-actuator</artifactId>
        </dependency>

        <!-- MySql -->
        <dependency>
            <groupId>mysql</groupId>
            <artifactId>mysql-connector-java</artifactId>
        </dependency>
        <!-- Druid -->
        <dependency>
            <groupId>com.alibaba</groupId>
            <artifactId>druid-spring-boot-starter</artifactId>
        </dependency>
        <dependency>
            <groupId>com.baomidou</groupId>
            <artifactId>mybatis-plus</artifactId>
        </dependency>
        <dependency>
            <groupId>com.baomidou</groupId>
            <artifactId>mybatis-plus-boot-starter</artifactId>
        </dependency>
        <!--lombok-->
        <dependency>
            <groupId>org.projectlombok</groupId>
            <artifactId>lombok</artifactId>
        </dependency>
        <!--junit-->
        <dependency>
            <groupId>junit</groupId>
            <artifactId>junit</artifactId>
        </dependency>
        <!-- log4j -->
        <dependency>
            <groupId>log4j</groupId>
            <artifactId>log4j</artifactId>
        </dependency>
         <!-- devtools热部署 -->
        <dependency>
            <groupId>org.springframework.boot</groupId>
            <artifactId>spring-boot-devtools</artifactId>
            <scope>runtime</scope>
            <optional>true</optional>
        </dependency>
    </dependencies>
</project>
2.3 写yml文件
resource->右键new file->application.yml 看到创建完的文件是个绿色树叶ok->填写配置内容:
server:
  port: 8001

spring:
  application:
    name: cloud-payment #微服务应用的名字
  datasource:
    type: com.alibaba.druid.pool.DruidDataSource  #当前数据源操作类型
    driver-class-name: com.mysql.jdbc.Driver  #mysql驱动包
    url: jdbc:mysql://localhost:3306/test?allowMultiQueries=true&useUnicode=true&characterEncoding=UTF-8&useSSL=false #useSSL安全加固
    username: root
    password: 123456

mybatis-plus:
  mapper-locations: classpath*:mapper/**/*.xml
    #实体扫描,多个package用逗号或者分号分隔
  typeAliasesPackage: com.test.springcloud.entitites
2.4 数据库环境准备
新建库表模拟数据库环境:
CREATE TABLE `payment` (
  `id` bigint unsigned NOT NULL AUTO_INCREMENT COMMENT '主键ID',
  `serial` varchar(200) DEFAULT NULL COMMENT '流水号',
  PRIMARY KEY (`id`)
) ENGINE=InnoDB  COMMENT='测试表';
2.5 写主启动类、业务类

tip:
- 注意添加相应注解,如@service等,因为只有加入这些注解spring容器才会接管来自动装配
- 注入的类是否在application的同级包或者子孙包下面,因为2.X以后只有同级包或者子孙包才可以扫描到(1.X只有子孙包),启动类注意加上Scan相关注解
1)PaymentController.java
@RestController
@RequestMapping("/payment")
@Slf4j
public class PaymentController {
    @Resource
    private PaymentService paymentService;

    @PostMapping(value = "")
    public CommonResult create(@RequestBody Payment payment) {
        try {
            paymentService.save(payment);
            log.info("插入完成");
            return new CommonResult(200, "插入成功", payment);
        } catch (Exception e) {
            return new CommonResult(500, "插入失败", null);
        }
    }

    @GetMapping(value = "/{id}")
    public CommonResult query(@PathVariable("id") Long id) {
        Payment payment = paymentService.getById(id);
        if (payment != null) {
            return new CommonResult(200, "查询成功", payment);
        }
        return new CommonResult(500, "查询失败", null);
    }
}
tip:Restful风格编写Controller:
@PostMapping增、 @DeleteMapping删、
@PutMapping改、@GetMapping查
2)PaymentService.java、PaymentServiceImpl.java、PaymentMapper.java
Mybatias-plus service层以及mapper层封装好了一些基本的增删改查方法,直接按照规范继承或实现即可,mapper里也可以少写很多。
public interface PaymentService extends IService<Payment> {
}

@Service
public class PaymentServiceImpl extends ServiceImpl<PaymentMapper, Payment> implements PaymentService {

}
public interface PaymentMapper extends BaseMapper<Payment> {

}
3)PaymentMapper.xml
<?xml version="1.0" encoding="UTF-8" ?>
<!DOCTYPE mapper PUBLIC "-//mybatis.org//DTD Mapper 3.0//EN" "http://mybatis.org/dtd/mybatis-3-mapper.dtd">
<mapper namespace="com.test.springcloud.dao.PaymentMapper">
    <!-- 通用查询映射结果 -->
    <resultMap id="BaseResultMap" type="com.test.springcloud.entities.Payment">
        <id column="id" property="id"/>
        <result column="serial" property="serial"/>
    </resultMap>

    <!-- 通用查询结果列 -->
    <sql id="Base_Column_List">
      id ,serial
      </sql>
</mapper>
4)Payment实体类、CommonResult实体类
@Data
@AllArgsConstructor
@NoArgsConstructor
public class Payment implements Serializable {
    private Long id;
    private String serial;
}

@Data
@AllArgsConstructor
@NoArgsConstructor
public class CommonResult<T> {
    private Integer code;
    private String message;
    private T data;

    public CommonResult(Integer code, String message) {
        this(code, message, null);
    }
}
2.6 测试子模块cloud-payment
测试插入POST:http://localhost:8001/payment body入参:{“serial”:“test1”} 
测试查询GET:http://localhost:8001/payment/1547406499788144642 
2.7 热部署
后期微服务增多,开启热部署,方便调试:

上文子pom中已经引入依赖: 
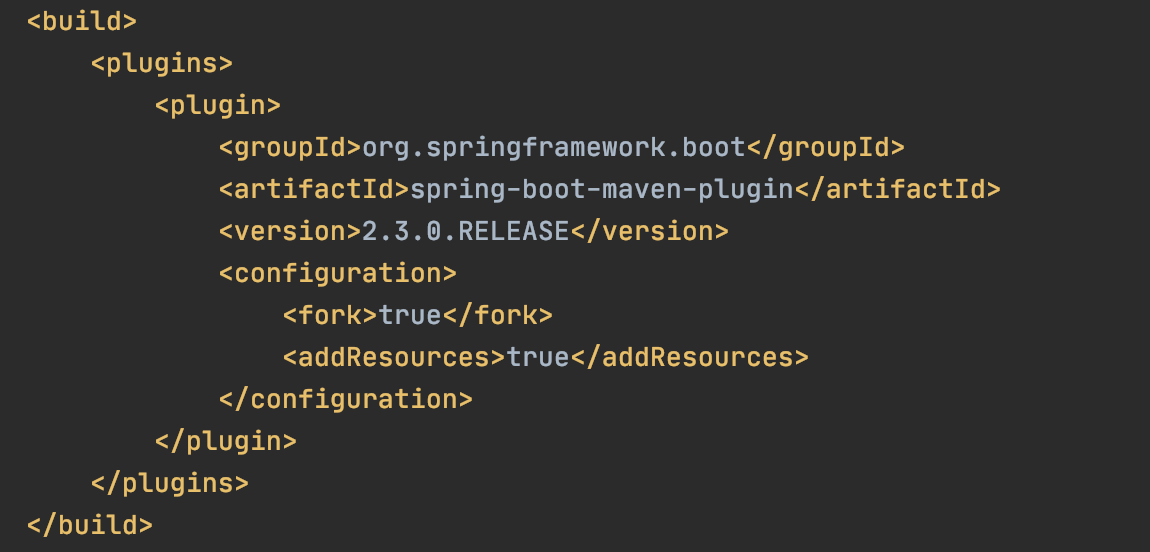
上文父pom中已经添加插件: 
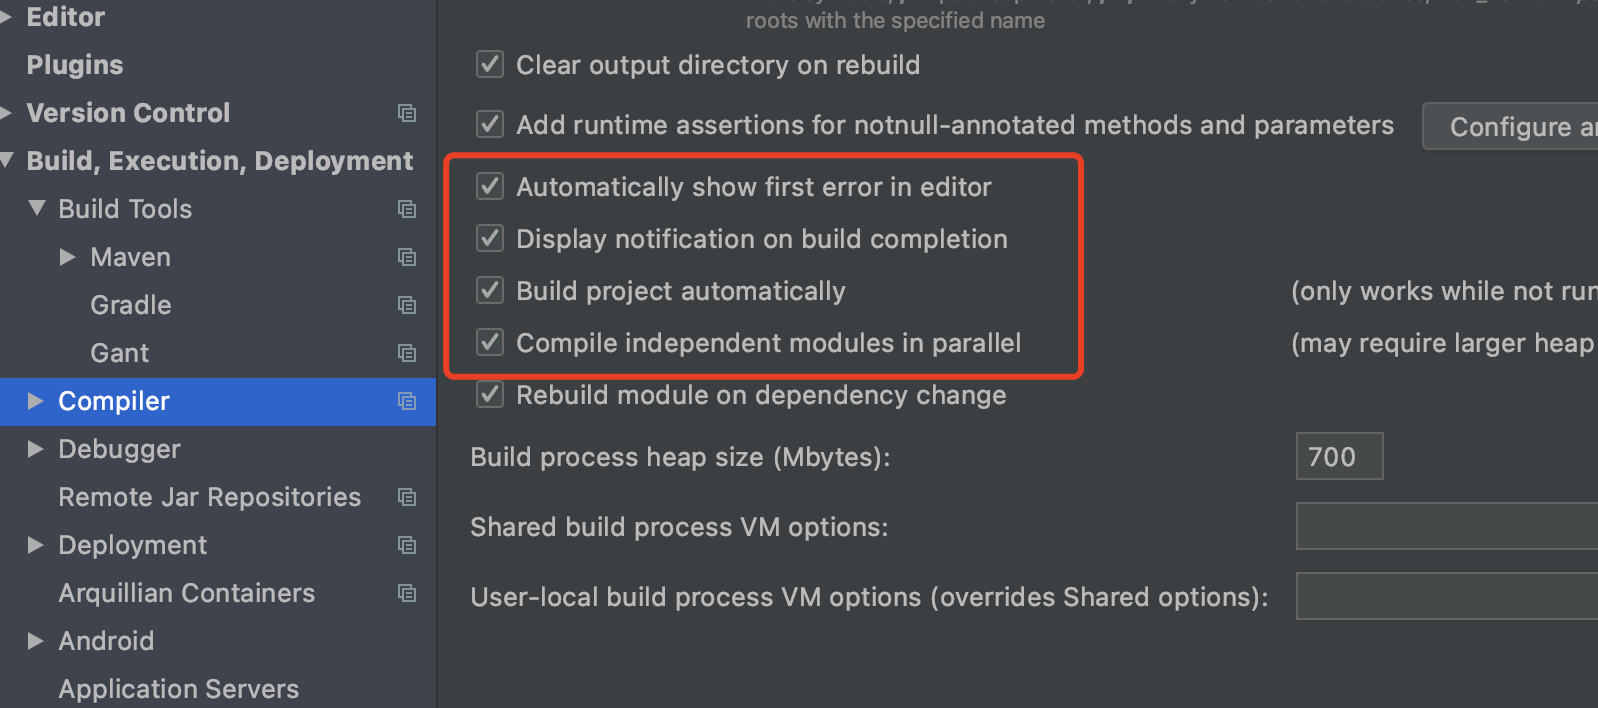
ctrl+alt+shift+/ 选择Registry->找到compiler.automake.allow.when.app.running、actionSystem.assertFocusAccessFromEdt两个勾选即可,如果没成功,重启IDEA,上线需关闭热部署。
3. 建子项目-服务消费者
同上步骤建立cloud-order工程: 
注:SpringBoot启动时会自动注入数据源,消费者工程目前不需要数据源,可通过在启动类注解上使用exclude 排除,同时将pom中数据源相关的注释掉,mybatis和mysql相关的,不然会启动报错。
OrderController .java、ApplicationContextConfig.java
@RestController
@RequestMapping("/consumer")
@Slf4j
public class OrderController {
    public static final String PAYMENT_URL = "http://localhost:8001";
    @Resource
    private RestTemplate restTemplate;

    @PostMapping("/order")
    public CommonResult<Payment> createOrder(@RequestBody Payment payment) {
        return restTemplate.postForObject(PAYMENT_URL + "/payment", payment, CommonResult.class);
    }

    @GetMapping("/order/{id}")
    public CommonResult<Payment> getOrderPayment(@PathVariable("id") Long id) {
        return restTemplate.getForObject(PAYMENT_URL + "/payment/" + id, CommonResult.class);
    }
}@Configuration
public class ApplicationContextConfig {
@Bean
public RestTemplate getRestTemplate() {
return new RestTemplate();
}
}RestTemplate:RestTemplate 是从 Spring3.0 开始支持的一个 HTTP 请求工具,它提供了常见的REST请求方案的模版,但是还是需要写一些代码,后面后讲到Feign通过注解就可以搞定。
4. 代码优化
微服务项目一般子模块会越来越多,公共的东西也就越来越多,所以一般我们抽取公共包处理: 同上新建module:cloud-common,将pom文件依赖粘贴进来,将order、payment工程中entities中相同内容剪切到common包中,将common工程maven clean->install到仓库,然后在order、payment工程中引入自定义的common包依赖:

5. 测试调用
测试插入POST:http://localhost:consumer/order 测试查询GET:http://localhost:consumer/order/1547406499788144642 不过多赘述 至此实现了order模块调用payment模块,最基础版的SpringCloud项目,后续陆续添加SpringCloud组件。