12. 整合Freemaker
大约 3 分钟
前面介绍了Freemaker,这节介绍SpringBoot整合MyBatis,同时结合Freemaker展现数据
5.1 项目创建
添加相关的依赖
<?xml version="1.0" encoding="UTF-8"?>
<project xmlns="http://maven.apache.org/POM/4.0.0" xmlns:xsi="http://www.w3.org/2001/XMLSchema-instance"
         xsi:schemaLocation="http://maven.apache.org/POM/4.0.0 https://maven.apache.org/xsd/maven-4.0.0.xsd">
    <modelVersion>4.0.0</modelVersion>
    <parent>
        <groupId>org.springframework.boot</groupId>
        <artifactId>spring-boot-starter-parent</artifactId>
        <version>2.3.9.RELEASE</version>
        <relativePath/> <!-- lookup parent from repository -->
    </parent>
    <groupId>com.bobo</groupId>
    <artifactId>springboot-demo09</artifactId>
    <version>0.0.1-SNAPSHOT</version>
    <name>springboot-demo09</name>
    <description>Demo project for Spring Boot</description>
    <properties>
        <java.version>1.8</java.version>
    </properties>
    <dependencies>
        <dependency>
            <groupId>org.springframework.boot</groupId>
            <artifactId>spring-boot-starter-freemarker</artifactId>
        </dependency>
        <dependency>
            <groupId>org.springframework.boot</groupId>
            <artifactId>spring-boot-starter-web</artifactId>
        </dependency>

        <dependency>
            <groupId>org.springframework.boot</groupId>
            <artifactId>spring-boot-starter-test</artifactId>
            <scope>test</scope>
            <exclusions>
                <exclusion>
                    <groupId>org.junit.vintage</groupId>
                    <artifactId>junit-vintage-engine</artifactId>
                </exclusion>
            </exclusions>
        </dependency>
        <dependency>
            <groupId>org.mybatis.spring.boot</groupId>
            <artifactId>mybatis-spring-boot-starter</artifactId>
            <version>1.3.2</version>
        </dependency>
        <dependency>
            <groupId>mysql</groupId>
            <artifactId>mysql-connector-java</artifactId>
        </dependency>
        <dependency>
            <groupId>com.alibaba</groupId>
            <artifactId>druid</artifactId>
            <version>1.0.14</version>
        </dependency>
    </dependencies>

    <build>
        <plugins>
            <plugin>
                <groupId>org.springframework.boot</groupId>
                <artifactId>spring-boot-maven-plugin</artifactId>
            </plugin>
        </plugins>
    </build>

</project>
添加相关的配置文件
server.port=8082

# 配置JDBC的相关信息
spring.datasource.driver-class-name=com.mysql.cj.jdbc.Driver
spring.datasource.url=jdbc:mysql://localhost:3306/logistics?characterEncoding=utf-8&serverTimezone=UTC
spring.datasource.username=root
spring.datasource.password=123456

# 配置连接池
spring.datasource.type=com.alibaba.druid.pool.DruidDataSource

# 配置MyBatis的package 设置别名
mybatis.type-aliases-package=com.bobo.pojo
创建实体对象
package com.bobo.pojo;

public class User {
    private String user_id    ;
    private String user_name  ;
    private String real_name  ;
    private String password   ;
    private String email      ;
    private String phone      ;
    private String u1         ;
    private String u2         ;

    public String getUser_id() {
        return user_id;
    }

    public void setUser_id(String user_id) {
        this.user_id = user_id;
    }

    public String getUser_name() {
        return user_name;
    }

    public void setUser_name(String user_name) {
        this.user_name = user_name;
    }

    public String getReal_name() {
        return real_name;
    }

    public void setReal_name(String real_name) {
        this.real_name = real_name;
    }

    public String getPassword() {
        return password;
    }

    public void setPassword(String password) {
        this.password = password;
    }

    public String getEmail() {
        return email;
    }

    public void setEmail(String email) {
        this.email = email;
    }

    public String getPhone() {
        return phone;
    }

    public void setPhone(String phone) {
        this.phone = phone;
    }

    public String getU1() {
        return u1;
    }

    public void setU1(String u1) {
        this.u1 = u1;
    }

    public String getU2() {
        return u2;
    }

    public void setU2(String u2) {
        this.u2 = u2;
    }
}
5.2 查询用户信息
创建接口
package com.bobo.mapper;

import com.bobo.pojo.User;

import java.util.List;

public interface UserMapper {


    List<User> query();
}
创建映射文件
<?xml version="1.0" encoding="UTF-8" ?>
<!DOCTYPE mapper
        PUBLIC "-//mybatis.org//DTD Mapper 3.0//EN"
        "http://mybatis.org/dtd/mybatis-3-mapper.dtd">
<mapper namespace="com.bobo.mapper.UserMapper">
    <select id="query" resultType="user">
        select * from t_user
    </select>
</mapper>
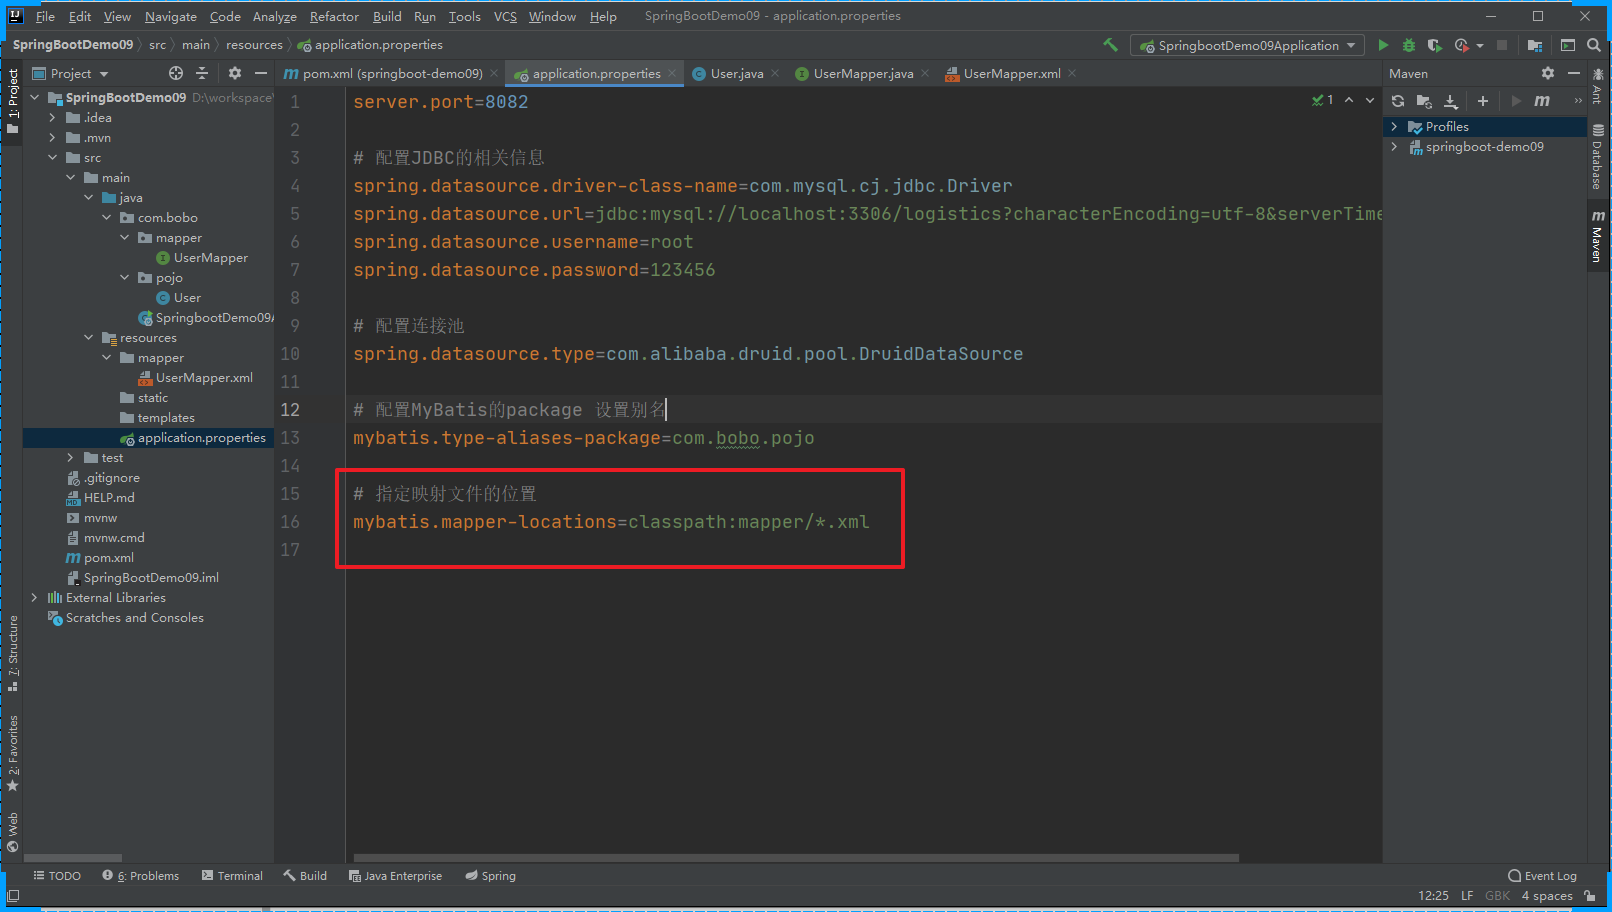
属性文件中添加Mapper映射文件的路径

创建Service
package com.bobo.service;

import com.bobo.pojo.User;

import java.util.List;

public interface IUserService {

    List<User> query();
}
package com.bobo.service.impl;
import com.bobo.mapper.UserMapper;
import com.bobo.pojo.User;
import com.bobo.service.IUserService;
import org.springframework.beans.factory.annotation.Autowired;
import org.springframework.stereotype.Service;
import java.util.List;
@Service
public class UserServiceImpl implements IUserService {
@Autowired
private UserMapper mapper;
@Override
public List<User> query() {
return mapper.query();
}
}创建控制器
package com.bobo.controller;

import com.bobo.pojo.User;
import com.bobo.service.IUserService;
import org.springframework.beans.factory.annotation.Autowired;
import org.springframework.stereotype.Controller;
import org.springframework.ui.Model;
import org.springframework.web.bind.annotation.RequestMapping;

import java.util.List;

@Controller
@RequestMapping("/user")
public class UserController {

    @Autowired
    private IUserService service;

    @RequestMapping("/query")
    public String query(Model model){
        List<User> list = service.query();
        model.addAttribute("list",list);
        return "/user";
    }
}
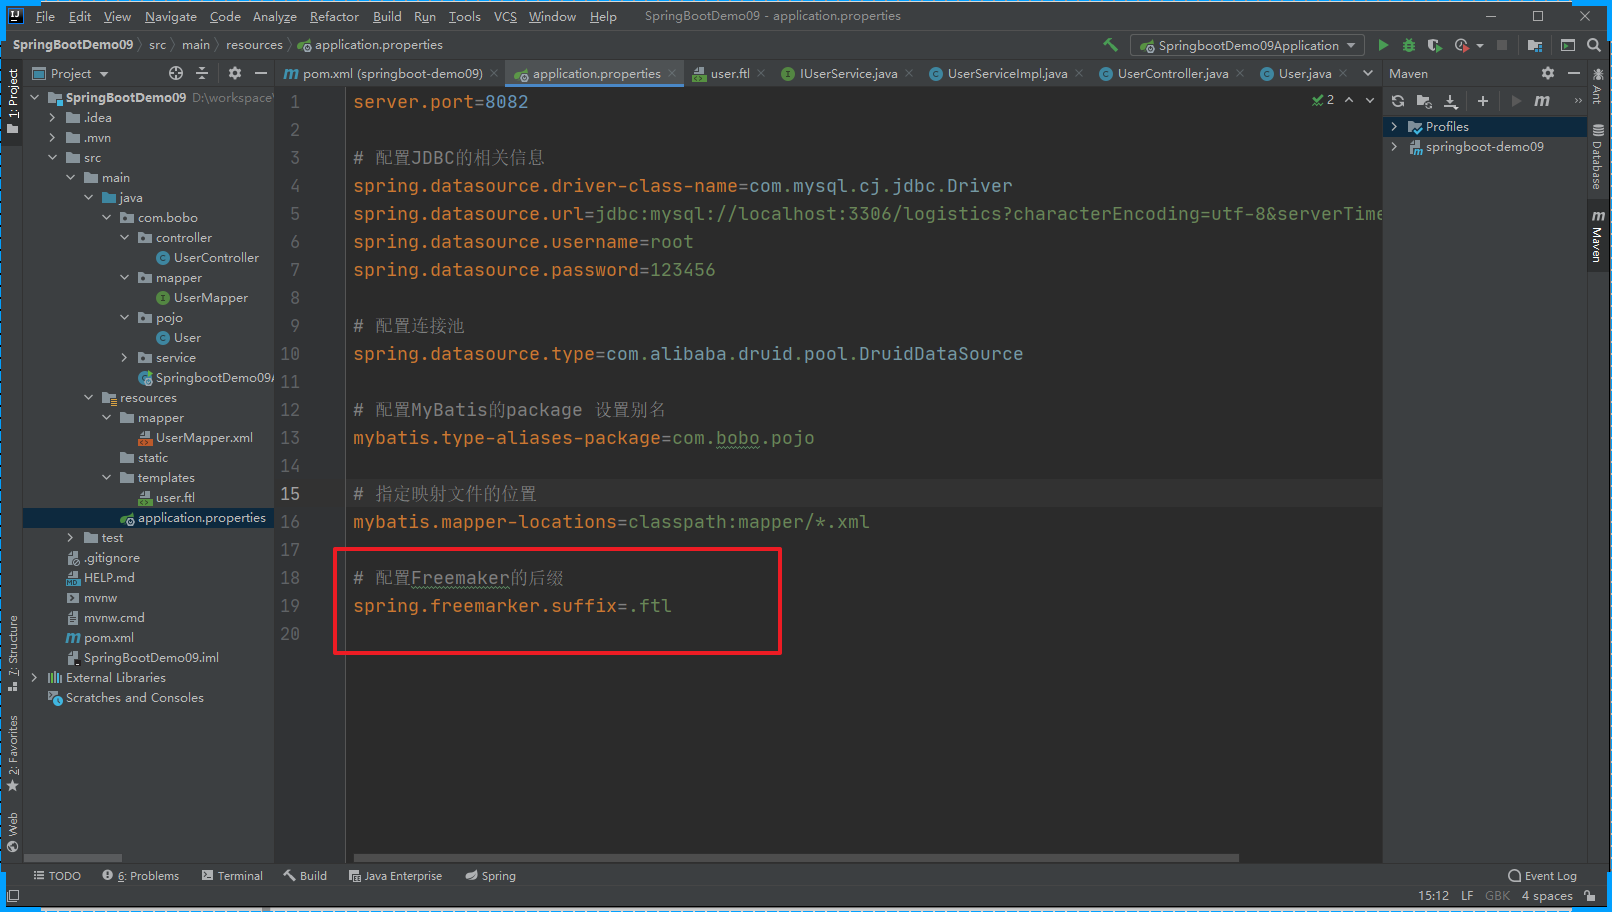
属性文件中配置Freemaker的后缀

创建Freemaker模板文件,并且展示数据
<html>
    <head>
        <title>用户管理</title>
        <meta charset="UTF-8">
    </head>
    <body>
        <h1>用户管理</h1>
        <table>
            <tr>
                <th>编号</th>
                <th>账号</th>
                <th>姓名</th>
                <th>邮箱</th>
                <th>电话</th>
                <th>操作</th>
            </tr>
            <#list list as user>
                <tr>
                    <td>${user.user_id}</td>
                    <td>${user.user_name}</td>
                    <td>${user.real_name!""}</td>
                    <td>${user.email!""}</td>
                    <td>${user.phone!""}</td>
                    <td>...</td>
                </tr>
            </#list>
        </table>
    </body>
</html>
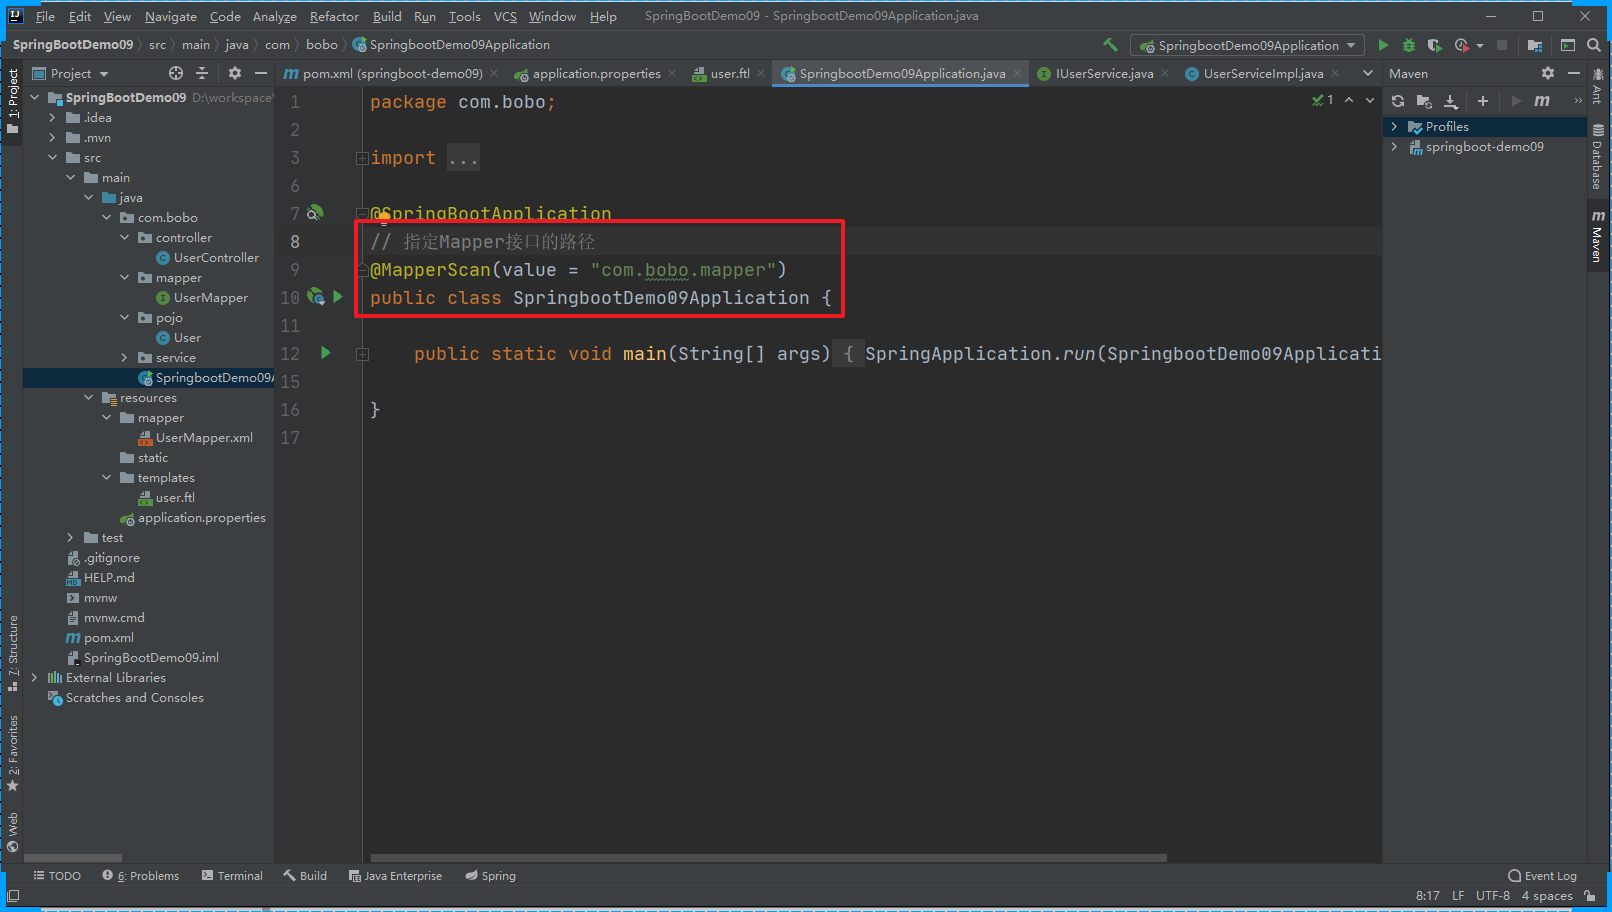
启动操作之前我们需要添加 MyBatis接口的扫描路径

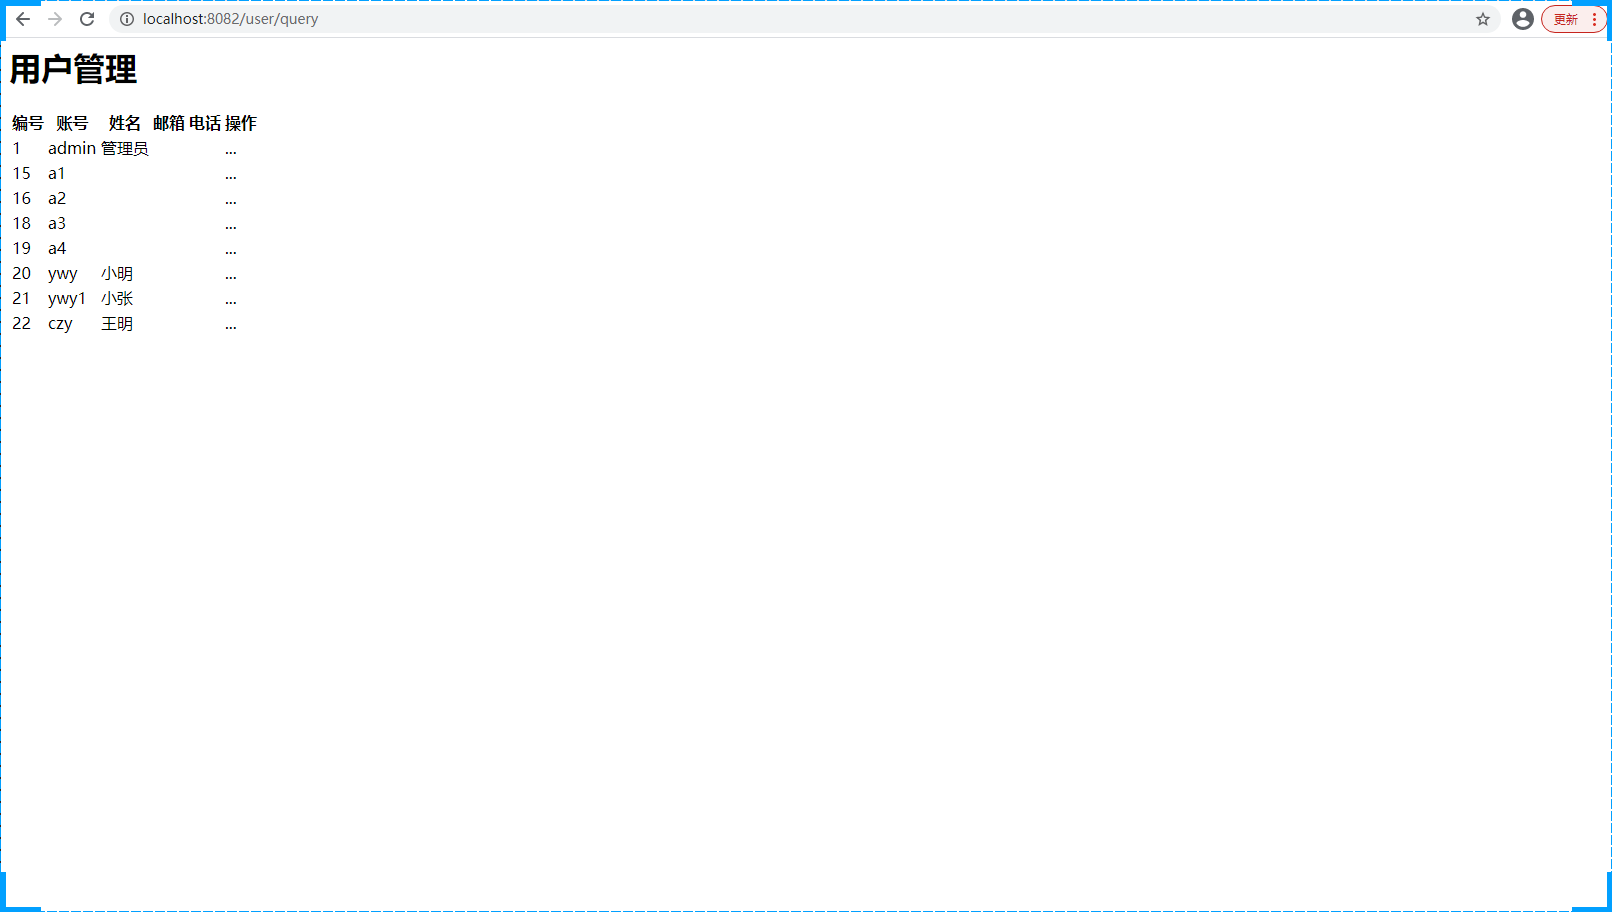
访问测试

5.3 添加用户
<html>
    <head>
        <title>用户管理</title>
        <meta charset="UTF-8">
    </head>
    <body>
        <h1>用户管理</h1>
        <form action="/user/userUpdate" method="post" >
            <label>账号</label><input type="text" name="user_name"><br>
            <label>姓名</label><input type="text" name="real_name"><br>
            <label>邮箱</label><input type="text" name="email"><br>
            <label>电话</label><input type="text" name="phone"><br>
            <input type="submit" value="提交">
        </form>
    </body>
</html>
5.4 更新用户
<html>
    <head>
        <title>用户管理</title>
        <meta charset="UTF-8">
    </head>
    <body>
        <h1>用户管理</h1>
        <form action="/user/userUpdate" method="post" >
            <input type="hidden" name="user_id" value="${user.user_id}">
            <label>账号</label><input type="text" name="user_name" value="${user.user_name}"><br>
            <label>姓名</label><input type="text" name="real_name" value="${user.real_name!""}"><br>
            <label>邮箱</label><input type="text" name="email" value="${user.email!""}"><br>
            <label>电话</label><input type="text" name="phone" value="${user.phone!""}"><br>
            <input type="submit" value="提交">
        </form>
    </body>
</html>
5.5 删除用户
<html>
    <head>
        <title>用户管理</title>
        <meta charset="UTF-8">
    </head>
    <body>
        <h1>用户管理</h1>
        <h2>
            <a href="/user/dispatchUpdate">添加用户</a>
        </h2>
        <table>
            <tr>
                <th>编号</th>
                <th>账号</th>
                <th>姓名</th>
                <th>邮箱</th>
                <th>电话</th>
                <th>操作</th>
            </tr>
            <#list list as user>
                <tr>
                    <td>${user.user_id}</td>
                    <td>${user.user_name}</td>
                    <td>${user.real_name!""}</td>
                    <td>${user.email!""}</td>
                    <td>${user.phone!""}</td>
                    <td>
                        <a href="/user/dispatchUpdate?id=${user.user_id}">更新</a>
                        <a href="/user/deleteUser?id=${user.user_id}">删除</a>
                    </td>
                </tr>
            </#list>
        </table>
    </body>
</html>